God says to us...
Wednesday, December 30
Monday, December 28
Ideas for leftover Ham
We usually have leftover ham after a big holiday feast. Here are some ideas for using up that yummy leftover ham meat when you tire of eating holiday leftovers...
 |
| Pic of our Spiral Glazed Ham before digging in. YUM!!! |
Ham, Egg, and Cheese Breakfast Casserole
Breakfast Omelet, Hash, Quesadillas
Ham Broccoli and Cheese Quiche
Ham Cheese and Potato Casserole
Ham and Corn Chowder
Crock pot Ham, Green Beans, and Potatoes
Ham Salad or Sandwiches
Note: You can also freeze the ham bone with a little meat on it to make a pot of beans or even make bone broth to use in soups or whatever you fancy.
Monday, December 14
Marinated Olives, Artichokes, Aoili, and Tapenade
Whenever I do an antipasto or a meat and cheese tray I make these olives and take them to a get together. I always get complements on how good they taste. My hubby hates black olives but loves the taste of them when I do it like this.
Marinated Olives
Ingredients:
2 Tbsp. olive oil
2 Tbsp. red wine vinegar
1 Tbsp. Balsamic vinegar
1 clove garlic, minced (1/2 tsp. of jar kind)
1/2 tsp. of Kosher salt (can use what you have)
1/4 tsp. ground black pepper
1/4 tsp. Agave or honey
a few dashes of an herb of choice (optional)
Green, black, or Kalamata olives
Directions:
Open can and/or jars and drain olives. Rinse the salt off under cold water. Mix all other ingredients in a bowl. Pour in olives and stir to coat. Pour all together (or separate) into a Ziplock bag or container and cover. Let marinate in refrigerator 5-7 days (give it a shake every other day to recoat) before you are ready to use it. The longer they sit in the marinade the better they taste. The olives (especially the black ones) will have a whole new taste so be prepared for a shock to your taste buds.
Note: My green olives were the 5.75 oz. jar, the pitted black olives were in a 6 oz. can, and when I buy Kalamata olives they are in a 6 oz. jar. Double the sauce for a larger batch or make half the recipe for a single can or jar of olives.
If you have plain artichokes and need some that are marinated here is how to do it.
Marinated Artichokes
Ingredients:
12 oz. jar of Quartered Artichoke hearts (or 14 oz. can)- these are not in marinade
2 cloves garlic, minced
1 tsp. whole peppercorns
1 Bay leaf
1/4-1/2 tsp. sea salt
1 tsp. Italian seasoning
1/4 tsp. crushed red pepper flakes
1-2 Tbsp. red wine vinegar
Half a lemon Juiced
1/4 cup Extra virgin olive oil
water (optional)
glass container to hold finished product in
Directions:
Open, dump, and drain artichokes into a strainer. In a container (I used a pt. sized mason jar) add artichokes and the other ingredients. Add in some water if you think the mixture is too thick for your liking. Close lid and give a good shake to mix everything. Let it sit in refrigerator for at least 7 days before using.
Note: A really quick and easy way to make this is to use a cup or so of your favorite Italian dressing poured on top of drained artichokes and let marinate 5-7 days before using.
Here is a quick and easy basic Aioli that tastes good and great to use as a condiment on sandwiches or as a sauce to put on meats as well as using for Fondue dipping sauce. If you don't like or care for mayo give this a try.
Basic Aioli
Ingredients:
1 cup Mayo
2 Tbsp. olive oil
1-2 Tbsp. fresh squeezed lemon juice (can sub with lime juice)
1 tsp. lemon zest (or lime zest)
3-4 garlic cloves, minced
1/4 tsp. salt
1/4 tsp. black pepper (or 1/8 tsp. cayenne for a kick)
Directions:
Mix all ingredients together in a bowl until blended. Pour in a glass jar with a lid. Refrigerate overnight to let the flavors blend. Serve cold or sit out 30 minutes before using.
Optional: add 1 tsp. Dijon Mustard, some pesto, or any herbs (basil, parsley, chives, cilantro, ect.) and spices (like chipotle, paprika, ect.). Adjust and experiment to change up the flavor to fit what you like
I had accidentally bought one of those small cans of chopped black olives that I had opened before realizing what it was. I searched online and decided to use it for a quick DIY Olive Tapenade. This doesn’t look so pretty but it’s an olive paste/spread that tastes good as an appetizer on sliced and toasted baguettes, veggies, buttery flavored crackers with spreadable cheese and/or slices of meat, spread on sandwiches, or stirred into your favorite pasta sauce. Tapenade can also be used as a seasoning for fish, or a topping.
Black Olive Tapenade
Ingredients:
4.25 oz. can chopped black olives
1 garlic clove, minced
2 Tbsp. chopped fresh herb of choice (parsley, basil, thyme, ect.) or 1 tsp. dried
1/8 tsp. black pepper
1 Tbsp. fresh lemon juice, Balsamic or any wine vinegar
2 Tbsp. olive oil
Directions:
- Combine everything in the food processor or blender.
- Process until a smooth paste forms (15 seconds or so). it may still look kinda thick.
- This is best made the day before so it can sit in the refrigerator over night for the flavors to blend. Store in an airtight container. Serve warm or cold.
Monday, November 30
Ideas for using up leftover Turkey
We usually have plenty of leftover turkey after a big holiday feast. We enjoy leftovers for a few days then tire of eating it the same way after a while. Here are some tasty ideas for using up that leftover turkey...
Turkey and Dressing Casserole
*This tasty turkey casserole recipe is made with leftover turkey or chicken, leftover stuffing and gravy, and a little cranberry sauce for topping. If you have leftover green beans that would work in this too.
Ingredients:
4 cups prepared turkey stuffing
2 cups cooked cut up or sliced turkey (or chicken)
1.5 to 2 cups prepared turkey gravy
1/2 cup (any leftover) jellied or homemade cranberry sauce
Preparation:
Butter bottom and sides of 2-quart baking dish. Arrange half of the stuffing in bottom of dish. Add half of the turkey or chicken then half of the gravy. Repeat layers with the gravy being on the very top. Cover with foil and bake for 15 minutes. Uncover and bake 15 more minutes. Serve with cranberry sauce on top.
Serves 4
Turkey Pot Pie
Ingredients:
1 1/2 cups frozen peas and carrots, thawed under cold water
5 tablespoons butter
5 tablespoons all-purpose flour
1/4 cup chopped onion
1/2 teaspoon salt
1/4 teaspoon pepper
1 3/4 cups turkey or chicken broth
2/3 cup milk
2 1/2 to 3 cups diced cooked turkey or chicken
Pastry for 9-inch two crust pie, prepared or purchased
Preparation:
Drain peas and carrots; set aside. Heat butter in 2-quart saucepan over low heat until melted. Stir in flour, onion, salt and pepper. Cook, stirring constantly, until mixture is bubbly; remove from heat then stir in broth and milk. Place back on heat; heat to boiling, stirring constantly. Boil and stir 1 minute. Stir in turkey and vegetables.
Prepare pastry. Roll 2/3 of the pastry into a 13-inch square; ease into ungreased 9-inch square pan. Pour turkey mixture into the pastry-lined pan. Roll remaining pastry into 11-inch square; cut out designs with small cookie cutter. Place square over filling; turn edges under and crimp. Bake in 425° oven until golden brown, about 35 min.
Serves 6
Turkey Shepherd’s Pie
Ingredients:
2 cups cubed cooked turkey
3/4 cup turkey gravy
1 can green beans, peas, or mixed veggies
2 cups prepared stuffing
1 (14-15 oz.) can whole kernel corn, drained (if not using mixed veggies)
2 cups leftover mashed potatoes
Directions:
In a greased 2-qt. baking dish, layer the turkey, gravy, carrots, stuffing and corn. Top with potatoes. Bake, uncovered, at 325 degrees for 45-50 minutes or until edges of potatoes are browned.
Serves 4
Turkey Noodle/Rice Soup
*Be sure to use the leftover turkey bones and carcass to make bone broth.
Ingredients:
2 cups cooked turkey meat, chopped
4 carrots, diced
2 stalks celery, diced
1 small onion, diced
2 cloves garlic minced
1 Tbsp. butter or EVOO
1 Bay Leaf
1 tsp. dried basil
1 tsp. dried oregano
1 tsp. dried parsley
1/4 tsp. ground black pepper
1 tsp. celery salt
1/2 tsp. sea salt
1-2 Tbsp. chicken bouillon base
8 cups chicken broth (or turkey broth or water)
8 oz. wide egg noodles or 1 cup rice
Directions:
In a skillet heat oil on medium heat. Add diced veggies and saute 5-10 minutes. Transfer to crockpot with everything except the noodles. Cook on LOW 6-8 hours. *The last 30 minutes of cooking add the egg noodles or rice.
Turkey Tetrazzini
1 cup hot water
1 can (10 3/4-ounce) cream of chicken soup
1 can (4 ounces) mushrooms, with liquid
2 cups diced cooked turkey
1 cup shredded Cheddar cheese
1/4 cup finely chopped onion
1 teaspoon dried parsley flakes
dash nutmeg
2 cups broken uncooked spaghetti
Spray inside of slow cooker crock with flavored cooking spray. In a bowl, combine the water, soup, and mushrooms with liquid. Stir in the turkey, cheese, onion, parsley, and nutmeg. Add broken up spaghetti. Stir to combine and pour into crockpot. Cover and cook on LOW for 4 to 6 hours, until spaghetti is tender. Mix before serving.
Serves 4 to 6
***Caution Note: Instead of cooking my noodles in the crockpot I boil the spaghetti on the stove, and stir them in after the other ingredients in the crockpot are done (remember to turn off crockpot first so that noodles don’t keep cooking and make a mushy gooey mess~ewww).
Turkey and Broccoli Casserole
8 ounces mushrooms
2 tablespoons butter
1 can (10 3/4 ounces) condensed mushroom soup
1/3 cup mayonnaise
3 tablespoons milk
1 tablespoon prepared mustard
1/4 teaspoon black pepper
4 cups diced cooked turkey
16 ounces frozen cut broccoli
1 cup shredded American cheese
1/4 cup toasted almonds*, optional
In a skillet over medium low heat, sauté sliced mushrooms in butter until tender. Spray inside of crockpot with cooking spray or lightly grease with butter. In crockpot, combine mushrooms, soup, mayonnaise, milk, mustard, and pepper. Stir in diced turkey and broccoli. Cover and cook on LOW setting for 5 hours. Stir in cheese; cover and cook 30 minutes longer. Sprinkle with toasted almonds, if desired, just before serving.
Serves 6
**To toast nuts, spread out in a single layer on a baking sheet. Toast in a 350° oven, stirring occasionally, for 10 to 15 minutes. Or, toast in an ungreased skillet over medium heat, stirring, until golden brown and aromatic.
Turkey Salad
Ingredients:
2 cups leftover cubed turkey
2 boiled eggs chopped (optional)
1/4-1/2 cup celery chopped
1/4-1/2 cup onion chopped
1 tsp. curry powder
2 tsp. Dijon mustard
1/2 cup Mayo
1/4 cup Cranraisins
1/4 cup Walnuts, chopped
Directions:
Mix everything in a medium bowl. Transfer to a container with a lid and chili in refrigerator a few hours before serving.
Sunday, November 22
Friday, November 20
Homemade Minestrone
***I couldn't believe how yummy this soup is. I've made it several times to perfect it to our liking. I believe I hit the jackpot. It's so tasty we couldn't get enough of it!
Homemade Minestrone Soup
Ingredients:
2 Tbsp. EVOO, EVCO (or good ole bacon grease :-D)
1 small onion, chopped
2 stalks celery
4 cloves garlic, minced
28 oz. can of diced tomatoes, undrained
16 oz. frozen mixed vegetables
2 small zucchini, diced
2oz. (2 handfuls) fresh baby spinach
15 oz. can cannellini beans (white kidney) drained and rinsed
15 oz. can red kidney beans drained and rinsed
1 tsp. dried parsley
1 tsp. dried oregano
2 tsp. dried basil
1/2 tsp. dried rosemary, crushed
1/2 tsp. dried thyme
2 whole Bay leaves
1/2 tsp. sea salt
1/4 tsp. ground black pepper
2 Tbsp. Better than Bouillon vegetable base (*this helps the flavor)
5 1/5 cups chicken or beef broth (or water)
1 cup uncooked shell, rotini, or elbow pasta
Directions:
Heat oil in a skillet and saute onion, celery, and garlic 10 minutes. Transfer to a sprayed 6 qt. slow cooker. Add everything else except the pasta (save for later). Cook on LOW for 6-7 hours. Add your pasta of choice to crock pot and finish cooking 30 more minutes or til pasta is done.
*Note: The vegetable base amps up the flavor in this. It is a must so don't leave it out if you can help it.
Thursday, November 19
Why I love my crockpot-
I am so thankful for slow cookers/crock pots. I have 4 of them that are different sizes. My hubby got me this Hamilton Beach 6 qt. "set it and forget" crock pots for Christmas 4 years ago. Why do I love them so much? There are 3 reasons I'm so thankful for having a crock pot.
1. I don't have to be rushed to get dinner in the oven at the last minute. My family always has a healthy meal waiting for us rather than having to rely on takeout or unhealthy frozen, boxed, processed foods.
2. This time of the year I can slow cook all my soups, chili, and stews while I'm busy with other things. I can literally set it and forget it! LOL
3. Sometimes I don't feel well enough to stand over a stove to cook so being able to put something in the crock pot til dinner time has been a huge blessing.
Tuesday, November 17
Homemade Tomato Basil Soup
*This soup is ridiculously easy to make. Why bother buying the canned stuff ;-)
Homemade Tomato Basil Soup
Ingredients:
2 Tbsp. EVOO, or Extra Virgin Coconut Oil
2 Tbsp. Butter
1 medium onion, chopped
2 cloves garlic, minced
6 vine ripe tomatoes, chopped/diced
28 oz. can whole peeled or diced tomatoes
2 tsp. dried basil (or 1 Tbsp. basil paste))
1 tsp. dried oregano or thyme
1 Bay Leaf
1/2- 1 tsp. sugar
1 tsp. sea salt
1/2 tsp. ground black pepper
1 cup chicken stock or veggie broth
1/2 cup canned Evaporated milk or room temp. heavy cream (optional)
Directions:
Heat oil and/or butter in a skillet on medium heat. Saute onion and garlic up to 10 minutes. Add vine ripe tomatoes and fresh basil if using that. Saute a few more minutes. Transfer to a 4-quart slow cooker with the rest of the other ingredients except milk/cream. Cook on LOW 4 hours or High 1.5 hours. (Could also just saute veggies and add everything to simmer the soup on the stovetop in a Dutch oven or big pot for 30 minutes.) Add milk/cream and cook 15 more minutes if you want a creamy soup. To make the soup smooth, take out Bay Leaf and puree in a blender (or use a handheld stick blender like I do).
Note: We LOVE this soup with homemade grilled cheese sandwiches. Have you tried grilled pimento cheese? If you haven't, you don't know what you're missing. I don't care for the store-bought kind. Give me the homemade stuff any day. We also kick our grilled cheese sandwiches up a notch and have sauteed onion and mushrooms stuffed inside with the cheese (use Swiss, Gouda, or Provolone cheese in these). Man, these are umm umm good! Sorry Campbell's but my way is the BOMB!!!
Sunday, November 15
Thursday, November 12
I'm thankful for...
 I am thankful that we're able to continue on with our Costco membership another year. We have been members now since 2009. I enjoy our monthly shopping trips. It's less than 10 minutes away from where we live. Even though there is only 3 of us nothing ever gets wasted. I'm very strategic when I shop there so that I don't buy anything we won't use on a regular basis. I'm always anxious to see what will be in their coupon booklet each month so I can see what I need to stock up on. I didn't know I would fall in love with buying things in bulk at warehouse prices. It feels great not having to constantly go out to the store when I run out of food or supplies. Just looking at the constant prices going up on our necessities can make you depressed. I love their organic foods. We get to try things we would have never thought of before. Not only do we get certain foods but I stock up on personal and household staples. This may not be the thing for everyone but we've seen first hand how it helps us save dollars and cents :-)
 Tuesday, November 10
Recipes using Cranberries
Crockpot Cranberry Sauce
Ingredients:
1 12oz. bag of fresh cranberries
1 cup of sugar (can do 1/2 white and 1/2 brown)
1 cup orange juice
Directions:
Spray crockpot with cooking spray. Put clean cranberries in crockpot. Pour sugar and orange juice on top. Cook on high for 2-3 hours until berries start to pop.
or this one which is my favorite...
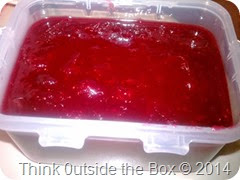
Crockpot Cranberry Sauce
Ingredients:
12oz. fresh cranberries
1/2 cup sugar
1/2 cup brown sugar
1/2 cup fresh orange juice
1/2 cup cranberry, apple, or Cranapple juice
Directions:
In a small crockpot (under 5 quarts) sprayed with cooking spray put in all the ingredients. Cook on High for 1 hour. Stir and continue cooking another hour. Stir every 15 minutes as the cranberries will soften and pop. Once it is the consistency you want turn off and cool down. Pour into a container and refrigerate over night for the flavors to blend.
Note: This is best made a day or two in advance so that the flavors will have time to sit and blend together. I do a mixture of white and brown sugar to give it an extra flavor boost. Using the juices instead of water enhances the flavor as well.
Creamy Cranberry Celery Sticks
Ingredients:
8 oz. cream cheese
2/3 cups dried cranberries
1/4-1/2 cup chopped nuts
6-8 celery stalks
Directions:
In a bowl mix cream cheese, cranberries, and nuts. Stir til blended. Fill each cleaned celery stalk with mixture. Cut each stalk of celery into four equal parts. Arrange on a platter and serve or place in a dish and wrap with saran wrap and chili in refrigerator until ready to serve.
Serves 6-8
Cranberry Cocktail Smokies
1 (12 oz.) bottle chili sauce
1 can cranberry sauce
2 pkgs. Cocktail or Lil’ Smokies
Directions:
Put everything in crock pot, cover, and cook on low for 4-6 hours.
*Be sure to stir after a few hours of cooking. Serve with colorful toothpicks.
2 pounds Ground beef
1 cup Corn flake crumbs
2 Eggs
1/2 cup Chopped, fresh parsley
1/3 cup Ketchup
3 tbsp. Minced onions
2 tbsp. Soy sauce
1/4 tsp. Garlic powder
1/4 tsp. Pepper
Sauce
16 oz. can, jellied or whole cranberry sauce
12 oz. Chili sauce
1 tbsp. Brown sugar
1 tbsp. Lemon juice
Directions:
In a large bowl, combine ground beef, corn flake crumbs, parsley, eggs, ketchup, onion, soy sauce, garlic powder and pepper. Mix well and form into small balls, from 1/2" to 3/4" in diameter. See * below. Place in a casserole or baking pan. Heat oven to 300 degrees F. Meanwhile in a saucepan, combine cranberry sauce, chili sauce, brown sugar and lemon juice. Cook stirring over medium heat until smooth. Pour hot sauce over meatballs in casserole. Bake for 30 to 45 minutes, depending on the size of the meatballs. Transfer to crock pot and keep on low for serving (could also just put frozen meatballs and ingredients for sauce in a crock pot. Cook meatballs on LOW a few hours and be sure to stir every once in a while to make sure they are well coated).
*Makes 4 to 5 dozen meatballs, depending on size.
Here's a cranberry breakfast recipe you may like to try:
Cranberry Smoothie
Ingredients:
1 very ripe banana
1 cup fresh or frozen cranberries
1 handful of fresh spinach
1 cup milk
1-2 tsp. honey
3 ice cubes (can omit if using frozen fruit)
Directions:
Blend all ingredients in blender until smooth. Pour into cup and serve.
Makes 2 cups
Note: In place of the milk you can use water, your favorite flavored Kefir, or even cranberry juice. If you use cranberry juice try replacing the fresh cranberries with 1-2 chopped apples. Any leafy green will work in this recipe (as well as celery) or you can leave it out all together.
Crockpot Cranberry Chicken
Ingredients:
4 chicken quarters.(can replace with 8 thighs or 4-6 boneless skinless chicken breasts)
8 oz. Catalina or French Dressing (I’ve tried both and couldn’t tell much difference)
1 15oz. can of whole berry cranberry sauce (I used the jellied one)
1 package dry onion soup mix (I made my own)
Directions:
Wash a drain chicken (If using quarters you can cut them into legs and thighs or leave whole). Put in a gallon Ziploc bag with the rest of the ingredients poured on top. Squeeze bag to make sure everything is mixed in good (I was lazy this time and just dump everything into the crockpot). When ready to cook spray crockpot with cooking spray and pour chicken with sauce in. Cook on LOW 6-7 hours for chicken with bones and skin or 4-6 hours for boneless chicken breasts.
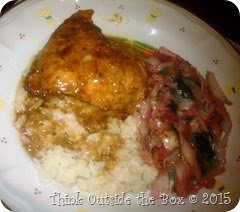
*Since I did not mix everything first in a Ziploc bag I ended up turning my chicken pieces halfway through cooking time and it still came out good. Serve with rice and a green veggie or salad. This time around I served it with cauliflower rice and sautéed cabbage and spinach with onions and garlic.
*For a freezer meal leave in Ziploc bag. Press as much air out as you can, close, and freeze to use later. Thaw out in refrigerator overnight when you are ready to use.
Cranberry Pork Roast
Ingredients:
3 lb. pork loin roast
salt and pepper to taste
1 15-16oz. can whole berry cranberry sauce
1/2 cup honey or brown sugar
1/2 cup cranberry juice
2 Tbsp. orange juice
1 tsp. dry ground mustard
1 tsp. cinnamon
1/8 tsp. nutmeg
1/8 tsp. cloves
Directions:
Sprinkle salt and pepper on both sides of pork loin then put into sprayed crockpot. In a medium bowl mix cranberry sauce, sugar, juices, and spices together. Pour over pork. Cover and cook on LOW 6-8 hours or high 4-5 hours.
To thicken gravy: Thirty minutes before meat is done take out some of the juice from roast. Combine the 2 Tbsp. cornstarch and cold water and mix together until smooth. Stir this into juice mixture from roast and pour back into crockpot to get warm.

Ingredients:
1 12oz. bag of fresh cranberries
1 cup of sugar (can do 1/2 white and 1/2 brown)
1 cup orange juice
Directions:
Spray crockpot with cooking spray. Put clean cranberries in crockpot. Pour sugar and orange juice on top. Cook on high for 2-3 hours until berries start to pop.
or this one which is my favorite...

Crockpot Cranberry Sauce
Ingredients:
12oz. fresh cranberries
1/2 cup sugar
1/2 cup brown sugar
1/2 cup fresh orange juice
1/2 cup cranberry, apple, or Cranapple juice
Directions:
In a small crockpot (under 5 quarts) sprayed with cooking spray put in all the ingredients. Cook on High for 1 hour. Stir and continue cooking another hour. Stir every 15 minutes as the cranberries will soften and pop. Once it is the consistency you want turn off and cool down. Pour into a container and refrigerate over night for the flavors to blend.
Note: This is best made a day or two in advance so that the flavors will have time to sit and blend together. I do a mixture of white and brown sugar to give it an extra flavor boost. Using the juices instead of water enhances the flavor as well.
Creamy Cranberry Celery Sticks
Ingredients:
8 oz. cream cheese
2/3 cups dried cranberries
1/4-1/2 cup chopped nuts
6-8 celery stalks
Directions:
In a bowl mix cream cheese, cranberries, and nuts. Stir til blended. Fill each cleaned celery stalk with mixture. Cut each stalk of celery into four equal parts. Arrange on a platter and serve or place in a dish and wrap with saran wrap and chili in refrigerator until ready to serve.
Serves 6-8
Cranberry Cocktail Smokies
1 (12 oz.) bottle chili sauce
1 can cranberry sauce
2 pkgs. Cocktail or Lil’ Smokies
Directions:
Put everything in crock pot, cover, and cook on low for 4-6 hours.
*Be sure to stir after a few hours of cooking. Serve with colorful toothpicks.
Cranberry Cocktail Meatballs
*Can use a bag of plain frozen meatballs or use this recipe to make homemade meatballs:2 pounds Ground beef
1 cup Corn flake crumbs
2 Eggs
1/2 cup Chopped, fresh parsley
1/3 cup Ketchup
3 tbsp. Minced onions
2 tbsp. Soy sauce
1/4 tsp. Garlic powder
1/4 tsp. Pepper
Sauce
16 oz. can, jellied or whole cranberry sauce
12 oz. Chili sauce
1 tbsp. Brown sugar
1 tbsp. Lemon juice
Directions:
In a large bowl, combine ground beef, corn flake crumbs, parsley, eggs, ketchup, onion, soy sauce, garlic powder and pepper. Mix well and form into small balls, from 1/2" to 3/4" in diameter. See * below. Place in a casserole or baking pan. Heat oven to 300 degrees F. Meanwhile in a saucepan, combine cranberry sauce, chili sauce, brown sugar and lemon juice. Cook stirring over medium heat until smooth. Pour hot sauce over meatballs in casserole. Bake for 30 to 45 minutes, depending on the size of the meatballs. Transfer to crock pot and keep on low for serving (could also just put frozen meatballs and ingredients for sauce in a crock pot. Cook meatballs on LOW a few hours and be sure to stir every once in a while to make sure they are well coated).
*Makes 4 to 5 dozen meatballs, depending on size.
Here's a cranberry breakfast recipe you may like to try:
Cranberry Smoothie
Ingredients:
1 very ripe banana
1 cup fresh or frozen cranberries
1 handful of fresh spinach
1 cup milk
1-2 tsp. honey
3 ice cubes (can omit if using frozen fruit)
Directions:
Blend all ingredients in blender until smooth. Pour into cup and serve.
Makes 2 cups
Note: In place of the milk you can use water, your favorite flavored Kefir, or even cranberry juice. If you use cranberry juice try replacing the fresh cranberries with 1-2 chopped apples. Any leafy green will work in this recipe (as well as celery) or you can leave it out all together.
Crockpot Cranberry Chicken
Ingredients:
4 chicken quarters.(can replace with 8 thighs or 4-6 boneless skinless chicken breasts)
8 oz. Catalina or French Dressing (I’ve tried both and couldn’t tell much difference)
1 15oz. can of whole berry cranberry sauce (I used the jellied one)
1 package dry onion soup mix (I made my own)
 |
| Chicken ready 2 cook w/everything dumped on top. |
Directions:
Wash a drain chicken (If using quarters you can cut them into legs and thighs or leave whole). Put in a gallon Ziploc bag with the rest of the ingredients poured on top. Squeeze bag to make sure everything is mixed in good (I was lazy this time and just dump everything into the crockpot). When ready to cook spray crockpot with cooking spray and pour chicken with sauce in. Cook on LOW 6-7 hours for chicken with bones and skin or 4-6 hours for boneless chicken breasts.
*Since I did not mix everything first in a Ziploc bag I ended up turning my chicken pieces halfway through cooking time and it still came out good. Serve with rice and a green veggie or salad. This time around I served it with cauliflower rice and sautéed cabbage and spinach with onions and garlic.
*For a freezer meal leave in Ziploc bag. Press as much air out as you can, close, and freeze to use later. Thaw out in refrigerator overnight when you are ready to use.
Cranberry Pork Roast
Ingredients:
3 lb. pork loin roast
salt and pepper to taste
1 15-16oz. can whole berry cranberry sauce
1/2 cup honey or brown sugar
1/2 cup cranberry juice
2 Tbsp. orange juice
1 tsp. dry ground mustard
1 tsp. cinnamon
1/8 tsp. nutmeg
1/8 tsp. cloves
Directions:
Sprinkle salt and pepper on both sides of pork loin then put into sprayed crockpot. In a medium bowl mix cranberry sauce, sugar, juices, and spices together. Pour over pork. Cover and cook on LOW 6-8 hours or high 4-5 hours.
To thicken gravy: Thirty minutes before meat is done take out some of the juice from roast. Combine the 2 Tbsp. cornstarch and cold water and mix together until smooth. Stir this into juice mixture from roast and pour back into crockpot to get warm.
Sunday, November 8
For the wages...
Romans 6:23 (KJV)
For the wages of sin is death but the gift of God is eternal life through Jesus Christ our Lord.
For the wages of sin is death but the gift of God is eternal life through Jesus Christ our Lord.
Sunday, November 1
Rejoice in the...
Philippians 4:4-8 (KJV)
Rejoice in the Lord always: and again I say, Rejoice.
Let your moderation be made unto all men. The Lord is at hand.
Be careful for nothing; but in everything by prayer and supplication with Thanksgiving
let your requests be made known unto God.
And the peace of God, which passeth all understanding,
shall keep your hearts and minds through Christ Jesus.
Finally, brethren, whatsoever things are true, whatsoever things are honest, whatsoever things are just, whatsoever things are pure, whatsoever things are lovely, whatsoever things are of good report,
if there be any virtue, and if there be any praise, think on these things.
Sunday, October 25
Therefore if any...
2 Corinthians 5:17-18 (KJV)
Therefore if any man be in Christ, he is a new creature: old things are passed away, behold all things are become new.
And all things are of God, who hath reconciled us to himself by Jesus Christ, and hath given to us the ministry of reconciliation
Therefore if any man be in Christ, he is a new creature: old things are passed away, behold all things are become new.
And all things are of God, who hath reconciled us to himself by Jesus Christ, and hath given to us the ministry of reconciliation
Wednesday, October 21
Monday, October 19
Chicken Corn Chowder
Chicken Corn Chowder
Ingredients:
6 strips of bacon
1 medium onion, diced
1 stalk celery, diced
2 carrots, diced
2-4 cloves garlic, minced
2-3 chicken breasts cut into bite-size pieces
4 medium potatoes (2 cups), peeled and diced (sometimes I sub with 2 sweet potatoes)
10.5 oz. low sodium cream of chicken soup
14.5 oz. can creamed corn
1/2 of 16 oz. bag of frozen corn (or 1 can of corn, drained)
1 tsp. salt
1/2 tsp. pepper
1/2 tsp. dried thyme
1 Bay leaf
2 Tbsp. butter
2 cups of chicken broth (or water but it won't be as flavorful)
1/2-1 c. half and half or 12 oz. can of evaporated milk (see note)
2-4 Tbsp. cornstarch (start with a little and add more if needed)
Directions:
Sauté bacon in a skillet until crisp. Drain on paper towels but keep 2 Tbsp. of the grease in the skillet. Cool bacon off, crumble and put in a covered container to use later. In the same skillet add onions, celery, carrots, and cook until soft. Can cook the potatoes for a few minutes as well. In crockpot add potatoes, cooked veggies, cut up chicken breasts, cream of chicken soup, corn (s), seasonings, butter, and broth. Cook on low 6 hours or until potatoes are done. Stir cornstarch and milk together in a bowl. Stir this mixture in the last 30 minutes of cooking to help thicken the soup. Remove Bay leaf. Sprinkle cooked bacon on top of chowder when serving.
Serve with a side salad and buttered crusty bread.
Serves 4-6
Note: You can sub any milk you prefer like almond or coconut milk.
Sunday, October 18
Tuesday, October 13
My Coupon Binder Part 3
Last time I talked to you about how to set our coupon binder up. If you missed the first part you can find it here. Today is the final tutorial. Once you get this part down you’re ready to go shopping. The things you will need now are your tab dividers, baseball card holders, highlighter, coupons, and scissors.
You may be wondering what you need the highlighter for. Many times the expiration date on the manufacture's coupon is hard to see or even find. By highlighting that date you will quickly be able to find it when you need to see if has or about to expire. You don’t want to make the mistake of taking expired coupons to the store and not be able to use it on a good deal you find. Another added benefit is that it’s easy to see through the clear pockets too.
Lets talk about the coupons for a moment. Where are good places to get them? I get mine in the Sunday paper each week. There are different packs like RedPlum, P&G, Smart Source, ect. I have even bought an extra paper just to be able to double on coupons of products I’d like to have more than one of when I come across a good deal. If you know someone who gets the Sunday paper but throws away their coupons, ask and see if they will let you take them off their hands. Other places you can find coupons are store sale ads, magazines, certain sections in the newspaper, inside of or on the front of the package of a product, at the store checkout after paying for your purchase, websites online where you can print them for free, ect. Once I’ve taken all my packs of coupons out of the paper I highlight any coupons that need it and begin cutting them out. I’m not brand specific so I cut out all the coupons for things I know we use or willing to try. Next I separate them into categories so that I can store them in their proper place in my binder. I was happy to have come across an idea of making your own coupon sorting mat. What a neat idea! I will definitely start using this myself.
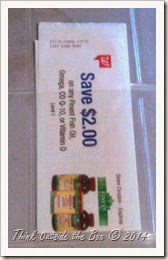
I mentioned last time I put my store coupons in a baseball card holder behind my page protector that holds the store ad. This is an up close look of one of those coupons sitting in the card holder. These would be the coupons I received at checkout. In many coupon policies they allow for store coupons to be used with a manufacture coupon for the same product. This is called “stacking coupons”. You save even more by using them together. I love those kinds of savings. Speaking of savings…majority of the time I only use my coupons when there’s a sale for that particular item. That way I’m not only getting it for the sale price, but I’m saving even more by using coupons with the sale price. You won’t really save much at the store by using coupons alone. Whenever you’re out shopping remember the best way to save is to use those coupons when the items go on sale.
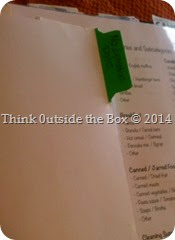
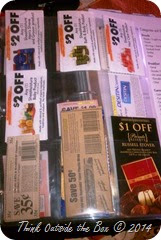
Having categories for all those coupons is a must. Here you see my tab divider for a section I use to store coupons the never expire. In the picture is a baseball card holder with those coupons stored in them. If you look closely you can see that I highlighted the expiration date in order for it to stand out at me.
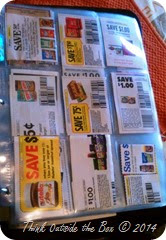
Here I have my tab divider for the food coupons. Behind that are the card holders with coupons in them. I find at times a coupon doesn’t easily fit into a pocket because of its size. Folding it so that the expiration date is showing usually helps. I mentioned last time I wanted to get some photo holders (3 pockets). That would be great to use for storing those oversized or awkward shaped coupons.
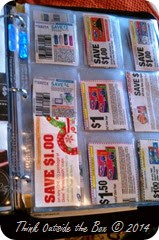
Another example you see here is my "Household Supplies" tab and coupons for those type items. On the left hand bottom side you see a coupon for some paper plates that’s too big. I had to fold it so I could still see the important info. but still able to place it in the pocket. So you see each category gets a tab divider and as many baseball card holders that section needs for the amount of coupons in that category. These are just a few of my many category sections. I plan to redo my sections to match how this lady does hers when I get more page dividers. I like how she uses the plastic dividers verses the paper kind. Those will last much longer. Towards the end of each month I go in and clean out any expired coupons I forgot to take out and move the ones that’s soon to expire in its place. This helps me have room to store more coupons I get.
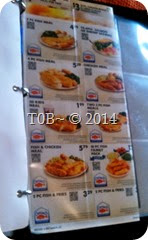
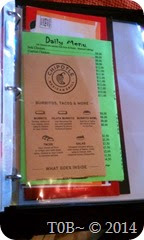
I also wanted to show you this section in the back of my binder. First you see the tab divider for my “Eating Out” section. Next are some coupons that came in the mail that I will cut out and store in the card holders. Last is a page protector where I store menus from places we would like to eat at or get take out food from. This is handy when you want to remember what’s on their menu or their address and phone number.

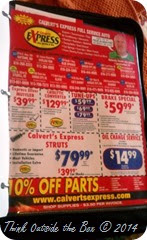
This last part I want to show you is a section for car stuff. I store coupons for repairs and flyers in page protectors for deals off any type maintenance.
Final reminder: Don't let all your hard work go to waist. Take your binder with you every time you go shopping. You never know what kinds of great deals you find. Remember that front section I showed you last time with the big see through (netted) pocket? When I'm out shopping I put the coupons I will be using at checkout in there so that I have them handy to just hand to the cashier before paying for my purchase. This will make getting out of line much quicker. You’ll be glad, the cashier will be glad, and those standing in line behind you will be glad you did. I hope you have enjoyed my coupon binder tutorials and got a better understanding of what it’s all about. For more info. on coupon binders check out some of this website and helpful video:
Frugal Living: How to make a coupon binder
Building a coupon binder
You may be wondering what you need the highlighter for. Many times the expiration date on the manufacture's coupon is hard to see or even find. By highlighting that date you will quickly be able to find it when you need to see if has or about to expire. You don’t want to make the mistake of taking expired coupons to the store and not be able to use it on a good deal you find. Another added benefit is that it’s easy to see through the clear pockets too.
Lets talk about the coupons for a moment. Where are good places to get them? I get mine in the Sunday paper each week. There are different packs like RedPlum, P&G, Smart Source, ect. I have even bought an extra paper just to be able to double on coupons of products I’d like to have more than one of when I come across a good deal. If you know someone who gets the Sunday paper but throws away their coupons, ask and see if they will let you take them off their hands. Other places you can find coupons are store sale ads, magazines, certain sections in the newspaper, inside of or on the front of the package of a product, at the store checkout after paying for your purchase, websites online where you can print them for free, ect. Once I’ve taken all my packs of coupons out of the paper I highlight any coupons that need it and begin cutting them out. I’m not brand specific so I cut out all the coupons for things I know we use or willing to try. Next I separate them into categories so that I can store them in their proper place in my binder. I was happy to have come across an idea of making your own coupon sorting mat. What a neat idea! I will definitely start using this myself.

I mentioned last time I put my store coupons in a baseball card holder behind my page protector that holds the store ad. This is an up close look of one of those coupons sitting in the card holder. These would be the coupons I received at checkout. In many coupon policies they allow for store coupons to be used with a manufacture coupon for the same product. This is called “stacking coupons”. You save even more by using them together. I love those kinds of savings. Speaking of savings…majority of the time I only use my coupons when there’s a sale for that particular item. That way I’m not only getting it for the sale price, but I’m saving even more by using coupons with the sale price. You won’t really save much at the store by using coupons alone. Whenever you’re out shopping remember the best way to save is to use those coupons when the items go on sale.


Having categories for all those coupons is a must. Here you see my tab divider for a section I use to store coupons the never expire. In the picture is a baseball card holder with those coupons stored in them. If you look closely you can see that I highlighted the expiration date in order for it to stand out at me.


Here I have my tab divider for the food coupons. Behind that are the card holders with coupons in them. I find at times a coupon doesn’t easily fit into a pocket because of its size. Folding it so that the expiration date is showing usually helps. I mentioned last time I wanted to get some photo holders (3 pockets). That would be great to use for storing those oversized or awkward shaped coupons.


Another example you see here is my "Household Supplies" tab and coupons for those type items. On the left hand bottom side you see a coupon for some paper plates that’s too big. I had to fold it so I could still see the important info. but still able to place it in the pocket. So you see each category gets a tab divider and as many baseball card holders that section needs for the amount of coupons in that category. These are just a few of my many category sections. I plan to redo my sections to match how this lady does hers when I get more page dividers. I like how she uses the plastic dividers verses the paper kind. Those will last much longer. Towards the end of each month I go in and clean out any expired coupons I forgot to take out and move the ones that’s soon to expire in its place. This helps me have room to store more coupons I get.


I also wanted to show you this section in the back of my binder. First you see the tab divider for my “Eating Out” section. Next are some coupons that came in the mail that I will cut out and store in the card holders. Last is a page protector where I store menus from places we would like to eat at or get take out food from. This is handy when you want to remember what’s on their menu or their address and phone number.


This last part I want to show you is a section for car stuff. I store coupons for repairs and flyers in page protectors for deals off any type maintenance.
Final reminder: Don't let all your hard work go to waist. Take your binder with you every time you go shopping. You never know what kinds of great deals you find. Remember that front section I showed you last time with the big see through (netted) pocket? When I'm out shopping I put the coupons I will be using at checkout in there so that I have them handy to just hand to the cashier before paying for my purchase. This will make getting out of line much quicker. You’ll be glad, the cashier will be glad, and those standing in line behind you will be glad you did. I hope you have enjoyed my coupon binder tutorials and got a better understanding of what it’s all about. For more info. on coupon binders check out some of this website and helpful video:
Frugal Living: How to make a coupon binder
Building a coupon binder
My Coupon Binder Part 2
I hope you enjoyed my last post and got a feel for what I use to carry my coupons around in. Today we will talk about how to set up our binder. This is the part that takes the most time to do but it’s so well worth it. First lets start with a list of supplies you will need.
- Clear sheet protectors
- tab dividers (I plan to buy these kind---will need a 2 or 3 packs)
-Baseball card or photo holders (chose from various sizes offered)
Now we’ll talk about how I make use of these supplies.
First lets talk about sheet protectors. I use them to store things like coupon policies, store sale papers, price list, category list for my coupons (will talk about later), and anything else I use that needs to be in eye view. These are a must have.
Next you will need tab dividers to separate your sections. I use one in between each store, information pages, and coupon sections.
Last you will need baseball card/pocket page protectors. The 9 pocket ones are what I use but I’m thinking of purchasing a small pack of photo holders. These are what you will store your coupons in. (will talk about in the next part).
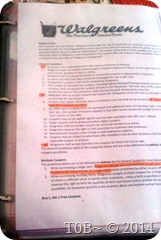
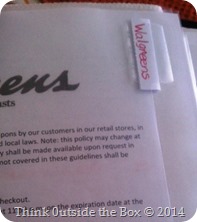

This is an example of my Walgreens section. I have their coupon policy in a page protector as well as their store ad, and a tabbed page divider. Also in this section I may store a baseball card holder page to store coupons or rewards card. Behind this I add another divider for any other drug store types (CVS, Rite Aid, ect.) and a copy of their coupon policy, ect. You can find coupon policies to print by visiting this site.
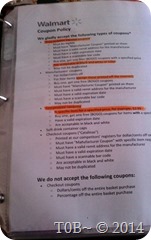
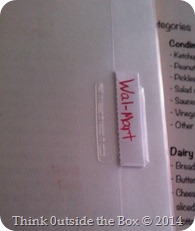

Now we move on to department stores like this one. Just like my Walgreens example I store Wal-Mart's coupon policy in a page protector and have a tab divider page to separate it from others. Behind this I add other department stores (Target, K-mart, ect.) and their coupon policy.
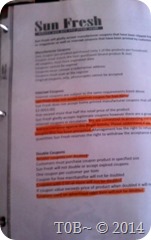
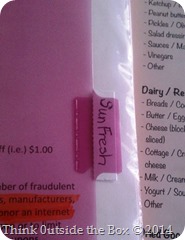
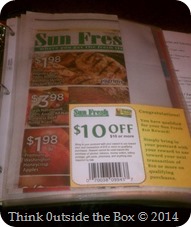
This is one of several grocery stores I shop at. As before I have my Sun Fresh coupon policy, page divider, and their store ad. We got a $10 off my purchase coupon in the mail so I stored it in with the store ad so I wouldn’t forget to use it at the store. Gotta save all you can. Shopping ain’t cheap yall!

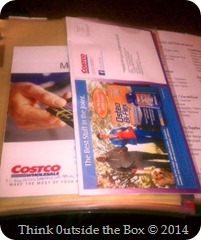
This is my Costco section. I store that month’s coupon book and our membership information in a page protector.
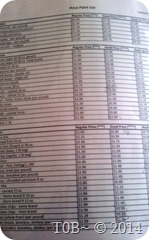
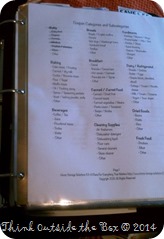
Here are two other helpful items I keep in my binder. The first one is a price list (can no longer find online). It is a list of common items you may purchase at the store often. It shows 3 prices beside each item. They are regular price, a good deal, and stock up prices. You’ll want to aim for the stock up price. It’s the best when using coupons to purchase (will talk about this next time). The other sheet are the coupon categories broken down for easy storing of our coupons in the binder (will tell you about that next time).
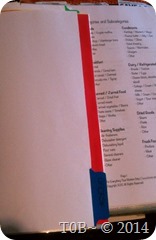
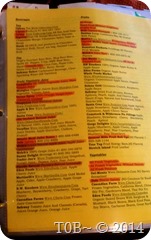
Here is a tabbed section I have for my GFCFSF lists. This is a list of foods you can look for in the store that are gluten free, casein free, and soy free. I got these lists off a yahoo group I used to be a part of. Let me interject with another thought for a moment. I HATE my page dividers. Hubby said he’ll get me whatever I want. I LOVE that man! I’m getting the ones I linked into this post. There I said it now moving on.
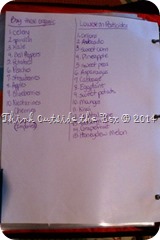
On the back of the divider I wrote a list of foods to buy organic and ones lowest in pesticides. Whew…I hope you understand what I mean buy this taking the most time. It is time consuming to put this thing together but once you have it finished the hard part is done and well worth the time and effort.
Well that’s all I have for today. Come back for the next part where we’ll get into…can you guess? Until then you and your be blessed!
- Clear sheet protectors
- tab dividers (I plan to buy these kind---will need a 2 or 3 packs)
-Baseball card or photo holders (chose from various sizes offered)
Now we’ll talk about how I make use of these supplies.
First lets talk about sheet protectors. I use them to store things like coupon policies, store sale papers, price list, category list for my coupons (will talk about later), and anything else I use that needs to be in eye view. These are a must have.
Next you will need tab dividers to separate your sections. I use one in between each store, information pages, and coupon sections.
Last you will need baseball card/pocket page protectors. The 9 pocket ones are what I use but I’m thinking of purchasing a small pack of photo holders. These are what you will store your coupons in. (will talk about in the next part).


This is an example of my Walgreens section. I have their coupon policy in a page protector as well as their store ad, and a tabbed page divider. Also in this section I may store a baseball card holder page to store coupons or rewards card. Behind this I add another divider for any other drug store types (CVS, Rite Aid, ect.) and a copy of their coupon policy, ect. You can find coupon policies to print by visiting this site.


Now we move on to department stores like this one. Just like my Walgreens example I store Wal-Mart's coupon policy in a page protector and have a tab divider page to separate it from others. Behind this I add other department stores (Target, K-mart, ect.) and their coupon policy.


This is one of several grocery stores I shop at. As before I have my Sun Fresh coupon policy, page divider, and their store ad. We got a $10 off my purchase coupon in the mail so I stored it in with the store ad so I wouldn’t forget to use it at the store. Gotta save all you can. Shopping ain’t cheap yall!


This is my Costco section. I store that month’s coupon book and our membership information in a page protector.


Here are two other helpful items I keep in my binder. The first one is a price list (can no longer find online). It is a list of common items you may purchase at the store often. It shows 3 prices beside each item. They are regular price, a good deal, and stock up prices. You’ll want to aim for the stock up price. It’s the best when using coupons to purchase (will talk about this next time). The other sheet are the coupon categories broken down for easy storing of our coupons in the binder (will tell you about that next time).


Here is a tabbed section I have for my GFCFSF lists. This is a list of foods you can look for in the store that are gluten free, casein free, and soy free. I got these lists off a yahoo group I used to be a part of. Let me interject with another thought for a moment. I HATE my page dividers. Hubby said he’ll get me whatever I want. I LOVE that man! I’m getting the ones I linked into this post. There I said it now moving on.

On the back of the divider I wrote a list of foods to buy organic and ones lowest in pesticides. Whew…I hope you understand what I mean buy this taking the most time. It is time consuming to put this thing together but once you have it finished the hard part is done and well worth the time and effort.
Well that’s all I have for today. Come back for the next part where we’ll get into…can you guess? Until then you and your be blessed!
Subscribe to:
Posts (Atom)


